When you were a kid and playing outside, did you ever go to the side of your house and feel the air coming out of the hole your dryer vent was in?
It especially felt nice when it was relatively cold outside, and your parents told you to play in the backyard. However, you noticed the dryer vent was slightly damp and hot as you felt it.
As you grew up and had a home to yourself, you might notice water gets stuck inside your dryer vent, but why?
The most common reason for water inside your dryer vent is poor ventilation. The poor ventilation comes from the vent not having a straight path outside or a blockage exists.
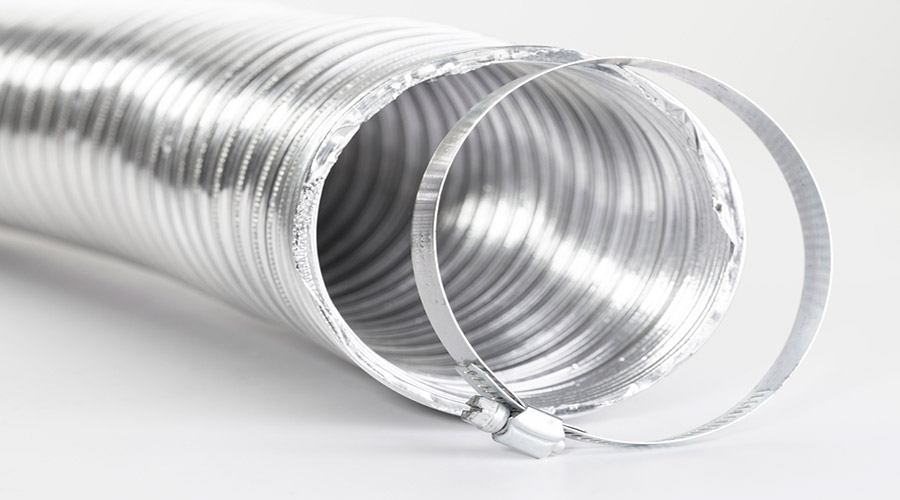
Sometimes, the pipe runs too far off into the distance and uses flex piping further than 8-feet long.
In doing so, the ductwork sags, which causes low spots and blocks the hot air from exiting the vent. As the hot air trapped behind the blockage begins to cool, the moist air condensates inside the dryer exhaust vent pipe. The result is water inside the clothes dryer vent.
As you might have guessed, having water stuck anywhere could cause an issue later on down the road, such as mold forming.
We want to avoid that at all costs, so we will discuss how to get water out of your dryer vent and why water builds up inside the duct in itself.
Why is Water in My Dryer Vent?
As mentioned above, the main reason water is in your dryer duct is poor ventilation. Let us go over in detail what that means below.
1. Your Duct is Long & Curvy
Having a long duct is not the issue, but if your dryer vents have multiple angles, they will likely have water buildup in some areas. In that case, always keep the duct as straight as possible.
2. The Ductwork May Be Uninsulated
Suppose your dryer vents run through an attic or crawlspace where it has relatively cold temperatures during the winters. In that case, the dryer vent pipe can lead to moisture buildup.
It might be a bit worse if your dryer vent hose runs vertically because the moisture can fall back down to the dryer and flex vent.
An excellent visual example of this is when it is cold inside your car, and you turn on the heat first. You might notice that moisture and fog are on the vehicle’s inside.
In that case, a dryer with humid, hot air feels the differences in air temperature from the attic; the dryer vent can have a lot of moisture buildup.
You would want to replace the dryer vent pipe in the attic with one that has more insulation to it or a pre-wrapped “sleeve” made from fiberglass.
3. Clogged or Dirty Dryer Vent
Having poor ventilation caused by clogged dryer vents will always cause issues later down the line, so it is essential to fix these issues. Clogs can occur inside the dryer exhaust vent pipe or the exterior vent cover.
Most people do not realize that you must clean your air duct at least once a year to maintain it. However, there is a massive potential of clothes dryer lint buildup causing poor airflow.
Not only that, but lint is highly flammable, which could potentially cause a dryer fire if you are not careful.
In that case, you will want to hire a professional or learn how to clean it out thoroughly yourself.
4. There is a Flex Vent Inside the Wall
If you have a flex vent inside the wall, it is not the best as a flex vent should only be used directly behind the dryer to the wall or in an attic.
However, if you place a vent inside the wall or ceiling, the dryer vent pipe should only be rigid metal ducts, as this will catch more lint that slows the airflow down and does not restrict the air passing through. A rigid metal duct provides a straight line exit for dryer exhaust.
Some vertical dryer vents go up and exit through the roof. These roof dryer vents are hard for homeowners to access and clean. Therefore should have a professional cleaning annually.
5. Dips in the Duct
If the dryer vents are long, they can sag as the years go by. By it drooping like that, water damage will occur over time by creating water pouches, if you will. These pockets of water will eventually cause blockages.
A flexible duct sags causing spaces for lint to collect causing blockages. These blockages cause hot dryer exhaust to cool and condensate causing water to get trapped in the dryer duct.
If this is the case, you will want to make sure you have a rigid metal duct and secure the vent with straps to remain straight with no significant descents.
6. Crushed Flex Vent Behind the Dryer
If your vent gets crushed behind the dryer, water can quickly build up inside it. Many homeowners opt to put the vent relatively close to the walls, but in doing so, it can easily crush the flex vent and restrict air coming through.
If you wish to see this case, pull the dryer vent outwards and see if the water issue goes away. Sometimes it is as simple as that.
How Do You Get Water Out of a Dryer Vent?
Ah, yes, the very question everyone wants to know is how you can get water out of your dryer vent.
You will want to purchase a dryer vent cleaning kit designed to be used with a drill.
What the Kit Provides
The cleaning kit comes with multiple elastic rods that clean up to 12 feet of ductwork. The flexible rods in the link above are 24-inches long and come in a pack of 6. You can use the lengths to determine how many you need.
The flexible brush head can reach into tight spaces due to its bendability. It has a plastic nose that helps you navigate through the pipes, and the rotating brush allows lint to flow directly and gets through the elbows relatively quickly.
How to Clean the Dryer Vents
Here are six easy steps to clean the clothes dryer vents:
- Step 1: It is most likely safest to clean the dryer ducts from inside the home, but make sure to use a vacuum cleaner, so you do not have lint dust everywhere.
However, it is essential to determine where you’re going to clean, the inside or outside. For example, if the duct is on the second floor, then it might be best to clean it from within.
In most cases, you’ll see that your dryer vent has a unique cap that allows you to attach it to the pipe, insert a vacuum hose, and insert the flexible rod.
- Step 2: Next, make sure to unplug the dryer and separate the dryer from the ductwork. Be careful if you have a gas unit, as you don’t want a leak to start.
- Step 3: Afterward, attach the flexible rod to your drill and set it to spin clockwise. Please do NOT put it in reserve because this could lead to an accidental attachment for the elastic rods, which we will get to in a second.
Set the drill clutch to the middle setting and push the brush in and out of the dryer duct, like you would brushing your teeth. If you can, you would want to use a vacuum as well.
- Step 4: Continue adding flexible rods as you go and tape them up with electrical tape, so they do not accidentally come loose in the vent. If that happens, things will not look pretty for you.
If you could remove the outside flapper open, that would be ideal, but if not, you can quickly get a paper clip or clamp to help it stay in place.
- Step 5: When everything is said and done, turn the dryer on and allow it to exhaust everything out. You’ll then be running the pipe back and forth a couple more times to ensure the lint blockage is cleared out fully. Make sure to wear a dust mask for your protection.
- Step 6: After cleaning the dryer, make sure to reinstall the flappers and the dryer itself, and you are done. If you have a broken vent flapper, make sure to replace that so no small animal gets in.
Final Thought
To summarize this article up, the reason why your ventilation system has a blockage is that the ventilation is poor.
If your vent does not have a straight path to go outside, water will build up over time, causing a blockage and a potential fire.
To avoid the issue, make sure to clean your ventilation system at least once a year thoroughly. You’ll then have a safer home to live in.


