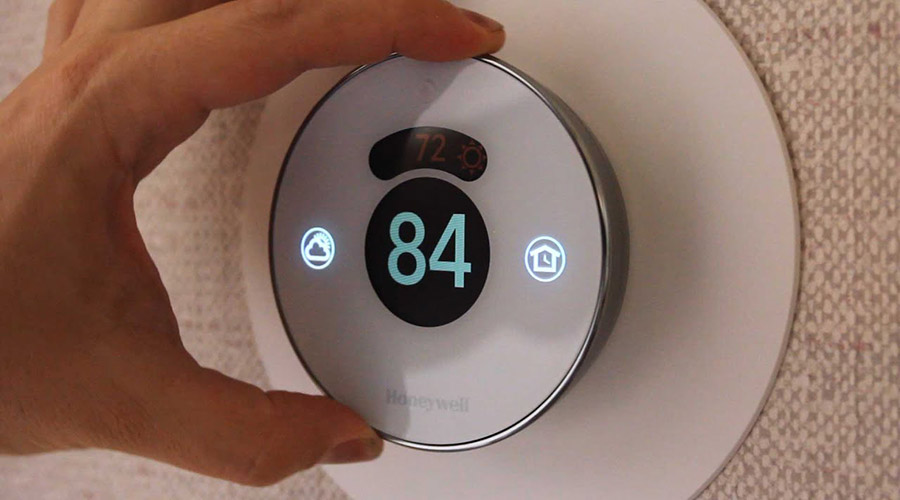
Some Honeywell thermostats have a WiFi feature built into the product, which opens up a new world of convenience for the homeowner. Getting the WiFi on these devices set up and working can pose a challenge, mainly when things don’t go according to plan. Following the steps closely to get your WiFi set up on your Honeywell thermostat will get you going in no time!
Each Honeywell Thermostat has a different method for setting up WiFi connectivity. Honeywell manufactures several WiFi thermostats and allows the unit to be controlled remotely via your smartphone or other devices connected to the internet.
Suppose you have a new Honeywell WiFi compatible thermostat installed, or for some reason, your existing thermostat has lost connection to the WiFi network. In that case, you will want to get your device back on the network to access all the features that this offers. It is not always necessary to call out an HVAC professional to fix this problem, so we have provided some information to get the job done yourself.
Troubleshooting Thermostat WiFi Connections
First, if it is a new unit, and you are trying to set it up for the first time on your network, or secondly, it is an existing unit that has lost its connection, and you are trying to re-establish the connection. These are some scenarios that fall into the scope of connecting your Honeywell thermostat to the WiFi network.
When troubleshooting a problem, it is always best to start with the simplest potential issues and work towards the more complicated issues as you eliminate the possibilities one by one.
If your thermostat is new and you are trying to connect it to the WiFi network for the first time, then you can skip down to the steps on how to get your thermostat connected.
If your thermostat was connected to the WiFi and, for some reason, it has now lost connection; you may want to perform some troubleshooting as the initial step before looking at the thermostat itself.
If you cannot access your thermostat on your WiFi network, you can check the following potential problems before delving into the settings on the thermostat.
- Power to the thermostat: Check to see that your thermostat has power. All the Honeywell thermostat models that offer WiFi as a feature need to have power supplied via the C wire or common wire. If your thermostat does not have power, then you know it is a wiring problem, and you probably need to call out your HVAC guy to take a look.
- WiFi frequency: The Honeywell thermostats only operate on the 2.4GHz wireless frequency. Most WiFi routers can transmit on the 2.4GHz or 5.0GHz frequency, or both. Configure your internet router to transmit on the 2.4GHz frequency to accommodate a connection for your thermostat.
- Wireless range: Wireless signals have a limited range, and they are affected by physical barriers that can weaken the signal and electromagnetic interference, limiting the range of the signal. If the thermostat is on the outer limits of the WiFi signal range, or there is interference close by, it may lose the signal intermittently. Try moving the router closer to the thermostat, or install a WiFi booster in the vicinity of the thermostat.
- Router firewall: The router firewall may block the thermostat from connecting. Make sure that the firewall allows the thermostat to connect.
- Turn the router off and back on: The final step that you can try is to reboot the WiFi router by turning it off and back on again. This step sometimes clears up any problems that the router may have in broadcasting the signal and accepting new connections.
If you have tried all these steps and your thermostat is still not connecting to the WiFi network, then it is time to investigate a little deeper into the settings of the thermostat itself.
Connecting A Honeywell 6000 And 8000 Series Thermostat To WiFi
Not all the units in the Honeywell 6000 series have WiFi capability. You can tell if your unit has the WiFi feature by checking the model number. All model numbers that are WiFi-enabled will have the WF designation after the model number.
For example, the RTH6580WF model indicates that this model has the WiFi feature by the WF letters at the end of the model number.
In the 6000 series, only the TH6320WF1 and RTH6850WF models have WiFi capability. In the 8000 series, the TH8320WF and RTH8580WF models have WiFi capability.
To set up the WiFi on these units, you will have to access the “WiFi Setup” screen with the following steps.
6000 Series
- Press and hold the “Fan” and up arrow buttons for 10 to 15-seconds.
- Press “Next” until the number 39 displays on the left side of the screen.
- Press the down arrow button to change the number on the right side of the screen to 0.
- Press “Done.”
- WiFi Setup should be flashing on the thermostat screen.
8000 Series
- Press the “System” button.
- Press and hold the second and fourth blank boxes for 10 to 15-seconds.
- Use the up and down arrows to change the number on the left to 0900.
- Use the up and down arrows to change the number on the right to 0.
- Press “Done.”
- The flashing “WiFi Setup” should be visible on the screen.
To set up the WiFi connection on these devices, you will need a tablet, laptop, or smartphone to complete the process. You will also need the password to your home WiFi network.
Follow these steps to set up the connection once you have your computer, tablet, or mobile phone ready.
- Make sure the thermostat display shows “WiFi Setup” on the screen.
- On your laptop, tablet, or phone, go to the list of available WiFi Networks.
- One of the networks displayed should be “NewThermostat_XXXXXX.” The numbers displayed in the XXXXXX field will vary from unit to unit.
- Connect to this network on your device. Choose “Home Network” if you get asked to specify the network type.
- When you have a connection to the thermostat, open a browser on your laptop, tablet, or smartphone. You will be re-directed to the thermostat WiFi setup page, but if you are not, you can type “http://192.168.1.1” in the URL window, and it will connect to the page.
- The setup page will list all the available networks that the thermostat unit can see. Find your home WiFi network in the list and select it.
- Fill in all the fields required to connect to the network, including the WiFi password. You will only be prompted for the password on some models once you click the “Connect” button.
- Click the “Connect” button.
- The thermostat will now connect to your home WiFi network, and you may lose connection to the thermostat on your browser. This process can take up to 3-minutes to complete.
- If the connection was successful, the thermostat will display the words “Connection Success” on the screen and display the signal strength in the top right corner of the unit.
- After about 60-seconds, the display on the thermostat will show the home screen. A message will prompt you to “Register at Total Connect.”
- You will then need to go onto the internet on your laptop or other device and register at the www.mytotalconnectcomfort.com site. This registration will allow you to have remote access to your thermostat.
Connecting A Honeywell 9000 Series Thermostat To WiFi
Connecting your Honeywell 9000 series to WiFi is easy and can be done on the thermostat screen. You will need your home WiFi password to complete the setup.
To connect your Honeywell 9000 series thermostat to WiFi, follow these steps.
- Press the “Menu” button.
- Press the “WiFi Setup” button.
- The thermostat will scan the WiFi networks in the area and display a list of the networks.
- Touch to select your network from the list.
- The screen will present you with a field to enter your WiFi password. Use the on-screen keyboard to enter the password. Click the “Done” button when you have entered the password.
- The thermostat will display a “Connection Successful” screen. Click the “Next” button.
- The next screen will display the thermostats MAC and CRC. Make a note of these numbers, as you will need them to register the device online.
- On your laptop or another internet-connected device, go to www.mytotalconnectcomfort.com and create an account. Register your thermostat on their system. This registration will allow you to remotely access your thermostat through the internet.
Connecting A Honeywell T5 And T6 Series Thermostat To WiFi
The T5 and T6 series Honeywell thermostats are easier to configure using the Honeywell Home App. Download this app from the Apple App Store or the Google Play store, depending on your device, before starting the setup on the thermostat.
Open the app and create an account on the app. You will need to know your WiFi network name and the password for your network.
The steps below will detail how to configure these units via the app.
- On the thermostat screen, press “Start Setup” on the screen.
- Select “Yes” to use the app to configure the thermostat.
- Open the Honeywell Home App on your smartphone and log in to the account you created when installing the app on your phone.
- The app will scan for active thermostats nearby and show your thermostat on the “Thermostat found” screen. Select your thermostat from the list.
- The app will connect to the thermostat and walk you through the settings to set up the thermostat, including selecting the WiFi network to connect to and the password for the network.
Connecting A Honeywell T9 and T10 Series Thermostat To WiFi
The first step to connecting your T9 or T10 Series Honeywell thermostat to WiFi is to enable the WiFi on the thermostat unit.
Follow these steps to enable the WiFi on a T9 or T10 series.
- Touch the screen to wake up the unit to present the full display.
- At the bottom of the screen is a “Menu” icon. Touch this icon to bring up the menu.
- Once the screen presents the menu, scroll down and select the “WiFi” menu option.
- Tap the “Enable” selection to make sure it is activated.
- Exit the menu.
To connect the T9 series Honeywell thermostat to your WiFi network, you will need to have your WiFi password on hand.
To connect to WiFi on the T9 series, follow these steps.
- Touch the screen to activate the display.
- Touch the “Menu” icon to bring up the menu.
- From the menu, select the “WiFi” option.
- Touch the “Choose network” option on the screen.
- The unit will scan for WiFi networks that it can locate in the vicinity. Select your network from the list.
- The screen will prompt you to enter the network password, which you can do from the touchscreen keyboard that is displayed.
- Once you have entered the password, the unit will connect to the network and return to the “WiFi” screen, displaying the network that it is connected to.
- Exit the menu.
Connecting A Honeywell Smart Round Series Thermostat To WiFi
The Honeywell smart Round thermostat can be configured to the WiFi network through the Honeywell Home app. This requirement means that you need to have the app installed on your device, and you must have an account registered on the app before proceeding with the steps.
To set up the Honeywell Smart Round thermostat on WiFi, follow these steps.
- Launch the Honeywell Home App and log in to your account.
- On the home screen, click the “Plus” sign to add a new device.
- Select the device you want to add from the list presented.
- Click the “Go” button on the thermostat display.
- Click “Next” on the screen on the app.
- The thermostat name will appear in the app. Select the name, and the app will connect to the thermostat.
- You will be prompted in the app to connect the thermostat to the same network that your mobile device is connected to. Click “Next” on the app.
- The connection process will begin, and the thermostat WiFi settings will be set to the same network.
- Once the connection is established, click “Done” on the top right corner of the app.
- The WiFi connection is now configured on your thermostat.
Connecting The Honeywell Lyric Round Series Thermostat To WiFi
The Honeywell Lyric Round thermostat requires the Lyric app to be installed on your smartphone to complete the configuration.
- Open the Lyric app and select the menu button in the top left corner.
- Select “Thermostat Name” for the type of thermostat that you are connecting to your home network.
- Select “Thermostat Configuration” and then select “Reset WiFi.”
- Press and hold the “Weather” button on the thermostat for at least 5-seconds.
- Highlight “WiFi” on the screen and select “OK.”
- On the next screen, select “Setup” and then press “OK.”
- When you are instructed to do so from the Lyric app, press “GO” on the thermostat display.
- The Lyric app will guide you step by step through the configuration process.
Conclusion
Setting up the WiFi connection on your Honeywell thermostat may seem a little daunting at first, but once you investigate how to do it, it is not as difficult as you may think.
If you have difficulty connecting your thermostat to the WiFi network, make sure you go through our troubleshooting steps to ensure that the problem is not related to your WiFi network configuration.
If your WiFi network is in order and the thermostat is well within the router’s effective range, you should be able to get it connected to the WiFi in a few minutes!


