Kickout flashing is integral to almost any building project. It is a requirement so homes can avoid water damages. But what exactly is kickout flashing?
Here’s what I learned about kick-out flashing from decades of working as a home inspector:
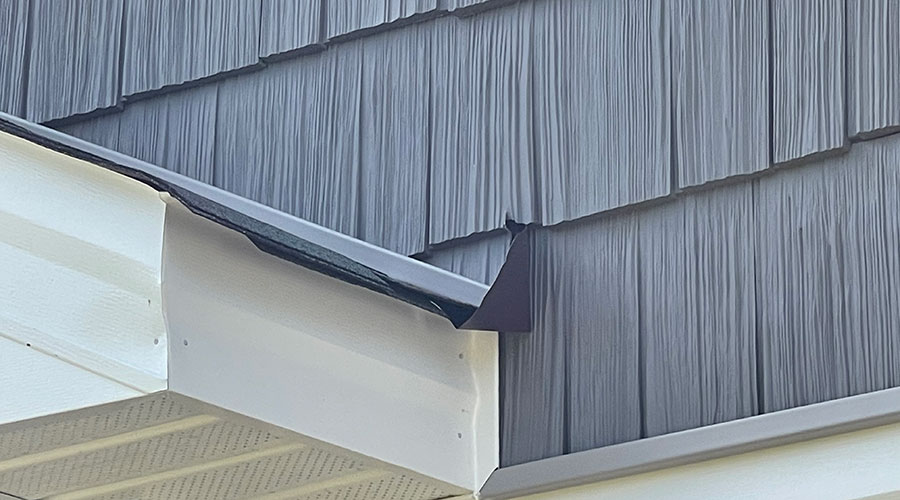
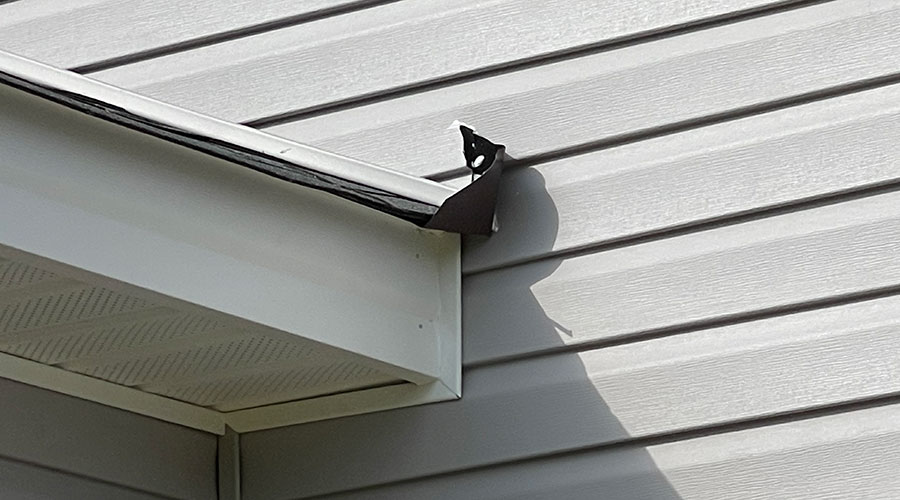
Kickout flashing is also called diverter flashing. The name kickout comes from how the flashing kicks water away from the structure. Flashing diverts rainwater from cladding and into the gutter.
You will want to use kickout flashing on whatever roof you install. For all covering, you will use it on most exteriors except for brick and concrete blocks.
But there’s more to kickout flashing than where it is used. Read on as we explore everything you need to know about kickout flashing.
Is Kickout Flashing Required?
The International Residential Code has required Kickout flashing for years. The IRC manual adds codes for kickout flashing in Section R903, made official in 2009.
The code has been updated from year to year, reestablishing the need for its use. The guidelines consistently state that flashing shall be a minimum of four inches in height and four inches in width. The vertical leg of the flashing is continuous under the siding.
Builders say that, despite being required by code, kick-out flashing sees neglect. Some roofers, builders, and the like have never even heard of it.
Why Is Kickout Flashing Required?
The International Association of Certified Home Inspectors says that missing kickout flashing is a leading reason for water penetration in your structure. Home inspection regulations are not in place to make a homebuilder’s work involved and tedious. The innovations of kickout flashing have long-term benefits for your home.
You should not overlook kickout flashing if you want your building to meet code regulations and guidelines.
The InterNACHI advises all inspectors to check for kickout flashing when they review a home, as an essential part of home longevity. Where kickouts are absent, homes see a build-up of water in the rot-prone areas.
Why is this? Modern homes use insulation and building wrap. Materials such as these have increased the demand for waterproofing.
We tend to focus on the roof because this is where you fix the kickouts. Yet, roofing is not the exclusive space kickouts prevent from getting water damage. Kickouts protect interior and ceiling walls, pavement, sidewalk, and landscaping as well.
Ensure you get the best kickout flashing by researching the available products. There are also some DIY methods to prepare flashing in a pinch.
Types Of Kickout Flashing
Kickout flashing comes from a variety of materials. DryFlekt makes polypropylene flashing. The product comes in many colors, which can help you choose based on your exterior decor preferences.
Standard kickout flashing cuts out of strips of metal.
There are also some kickout flashing plastic products available on Amazon. Premade kickouts sell as an easy-install clip-on under the first shingle at the edge of your roof.
How Do You Bend Kickout Flashing?
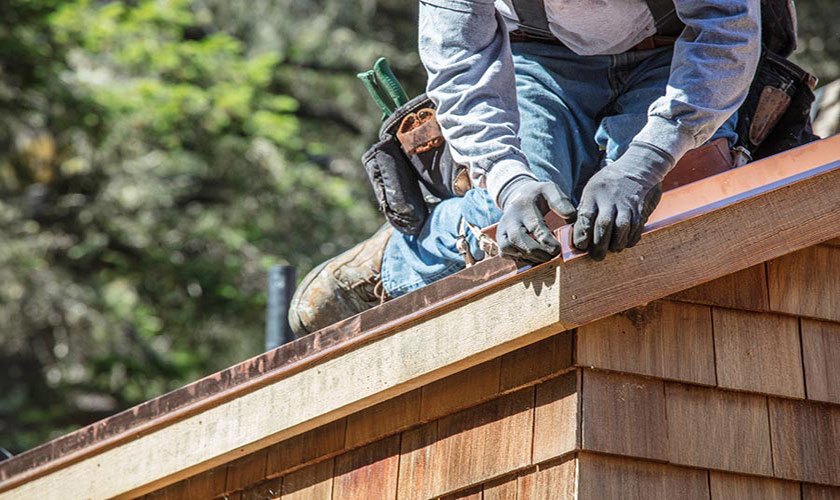
FineHomebuilding has some suggestions for bending kickout flashing. Builders do this sometimes if they don’t have the flashing on hand. The pros also do this if they use materials such as copper flashing and want the kickouts to match. Here are the steps you need to follow:
- Start by cutting a piece out of coil stock and making a 90-degree bend.
- After this first bend, you will mark six inches into the crease.
- You will then secure the metal streamers and continue by bending flashing upward. You will make a 90-degree fold as if you were wrapping a present.
- Builders then suggest using a small block of wood to flatten the bends. At this stage, builders will sometimes style the kickout a bit by rounding the cut with a pair of tin snips to make it look more appealing.
- Use a straightedge to get the bend angles right. You have to get the bend angle right to ensure the kickout diverts the water away from the siding. An incorrect measurement will see water splashing back on the wall, much to your frustration.
How To Install Kickout Flashing
Guidelines provide insights for proper installation. To install kickout flashing, you will need a caulk gun, a drill, a hammer, a pry bar, and tin snips. You’ll be using exterior caulk and cap flashing to affix the kickout flashing.
1. Inspect The Sidewall First
Before you put the kickouts on the house, you should inspect the sidewall. Look for signs of moisture penetration and rot. Most rot prone are those spots where the roof and interior wall meet. You should also check where the gutter ends at the chimney if you have one.
2. Place The KickOut Under The First Shingle
You will place the kickout flashing under the first shingle of the roof, starting from the edge corner. The flashing slips under this shingle. You lift the shingle from the bottom to slip the flashing under it. Then, you’ll either nail it in or glue it in if you can’t fix nails or staples in it. With brick or stonework sidewall, nailing will be impossible, so you will have to use a strong adhesive.
3. Add Roofing Felt
Add a strip of roofing felt at this stage to act as an extra layer.
4. Add Step Flashing, Cover With Cap Flashing
Once you’ve secured the kickout under the first shingle, you’ll work your flashing in around the sidewall. You’ll add the cap flashing after that.
These are essential steps. Pro home builders also give insights on extra leak proofing you can add to sustain your kickout flashing.
Understand the basic steps and why you have to do them in order. You may run into some situations where installing kickouts is tricky. Review these steps for starters, and refer to some expert advice on “trick walls” and how to flash them with ease.
5. Trick Walls And Kickout Flashing
You are going to run into the occasional headache when it comes to applying kickouts. FineHomebuilding insights walk you around the trickiest walls for a perfect installation. Builder Mike Guertin demonstrates for the magazine how he uses layers of redundant flashing to support his kickouts. He adds this to prevent water from slipping behind the gutter and causing damages.
Guertin says that he integrates redundant flashing layers into the house wrap. House wrap builds his foundation for starting a roofing job. He uses flexible flashing tape to hold his house wrap and other pieces to the eaves for reinforcement.
Once you have completed the basic steps and understood some extra hacks for tricky projects, you’re ready to add that extra waterproofing pro-builders swear on.
6. Leak-Proof Your Flashing
ProRemodler shares some secrets to guarantee your flashing is leak-proof. They recommend buying prefabricated kickouts. These typically cost around $20.
Remodelers also suggest using an instant flashing membrane to waterproof walls, which adds support to the kickouts. Instant flashing is a peel-off membrane that you apply directly to walls before sheathing.
There is even a rapid flashing that is paint-on called FastFlash. These products work to help leak-proof walls and roofs and add support to your flashing. You apply these as a first leak-proof step.
The next thing remodelers recommend is to put a stick-on membrane around the eaves. You’ll also install a metal drip edge here. Waterproof this area to add a preventive layer at the point where the roof meets the wall.
Leakproofing isn’t a substitute for kickouts. Once you’ve added all of these extra waterproof features, you will install the kickouts up to the regulation code. You need these diverters to make your other waterproofing matter.
To add a final layer of protection, ProRemodler says to weave in and flash step flashing. You’re adding overlapping layers with this step flashing, which enforces all the other waterproofing you did.
How Kickout Flashing Helps You Save Money
Kickout flashing is inexpensive. If you install it with roof replacement or repair, it will save you thousands of dollars, diverting water from the siding.
Kickout flashing goes with all types of siding. Even brick and stonework should have kickout flashing to prevent water wear from years of rain, ice, hail.
Home inspectors have called kickout flashing “essential” for preventing water damage. The flashing acts as a “membrane” along with the fascia board. If you install it correctly, that membrane kicks water off the house, but it also provides a barrier against it, which prevents rot. Consider kickout flashing as an armor for the weak spots in the roofing where rotting is more likely. Family Handyman shows the areas where rot spots are at the highest risk, usually at the intersection of roof and sidewall.
What Happens If You Don’t Use Kickout Flashing?
Your home will inevitably have water damages without kickout flashing. InterNACHI inspectors note that many home builders don’t know how to use kickout flashing. They can observe the degree of water damages to estimate the cost of repairs.
Some builders note that, without kickout flashing, you’ll get more than water rot. You will also have to pay for mold damages because damp areas attract mold build-up. Mold grows in damp places, and kickouts can prevent this growth.
Just as the lack of kickout flashing invites water damages, there are bad consequences to improper kickout installation too. Your flashing is only going to help you if you’ve done it right. Do a quick check of your work to be sure that you have the kickouts correctly installed.
The flashing has to be watertight at the seam to work. Otherwise, the flashing will leak, and water will splash onto the sidewall, defeating the purpose of flashing.
Ensure that the diverter angle is at least 110 degrees. It should never be less than this, says InterNACHI.
If you add DIY kickouts, you want to check to make sure your 90-degree bend angles are precise and that you have rounded and shaped them perfectly. Use prefab kickout flashing in case of doubt. Prefab materials are measured on machines and avoid the risk of incorrect measurements altering the water diversion.
Can I Modify Kickouts?
It would not be recommended for a homeowner to modify their kickout flashing. Inspectors note that home buyers who fail to understand the importance of kickouts will alter them to enhance home appearance.
The InterNACHI states that the kickouts should not be modified. The association sets the standard at six inches for kickout height and width.
Some manufacturers allow for only four inches, but this is the height and width minimum. Common homeowner modifications to the kickouts shorten them. Never do this. Shortening kickouts reduces the protection they provide your home.
Some homeowners also hate the way that kickout diverters angle. Don’t change the tilt of your kickout for cosmetic reasons. It will not work to divert water unless it is at 110 degrees. Anything less and water will splash onto the house and soak up the rot-prone sidewall.
Adding Paint To Flashing
What about paint? Is it okay to paint over the kickouts to design them and make them look nicer? Painting is welcomed and encouraged. If you don’t paint metal flashings, they will rust. That said, Ask The Builder reminds you that flashings require special primers applied before painting. You should also wash the flashings with soap and water and dry them before applying any primer or paint. Washing rids the metal of oil from the milling process, which prevents paint chipping.
Conclusion
Kickout flashing pays off!
A little money and some extra labor can save you thousands of dollars on your home repair and improvement costs. For the measly 20 bucks that it costs to buy a kickout flashing, you will prevent roof, sidewall, interior wall, and ceiling water from rotting.
You will have diverted mold growth. You’ve slowed the frequency of roof replacement, and you’ve ensured the longevity of your exterior.
Kickout flashing pays off in spades from its selling price. Custom-made flashings allow you to put them on your house in style.
You can’t afford not to install kickout flashing. Never fail to guarantee these flashings are part of your roof repair.
If in doubt, hire a professional.
Are you worried that you won’t put the kickouts in the right place? Seek a professional. Gutter services and home builders typically handle flashing jobs. Call on professionals when you aren’t sure you have advanced your home-building skills enough to place kickouts.
Sources:
Kickout Flashing: Required by Code, Yet Often Overlooked
Kickout Flashing: How to Flash Troublesome Roof-to-Wall Intersections


