If water is leaking from the bottom of your water heater, it’s important to find out why and take corrective action. In this article, we’ll discuss the possible causes of water heater leaks from the bottom and what you can do to fix them.
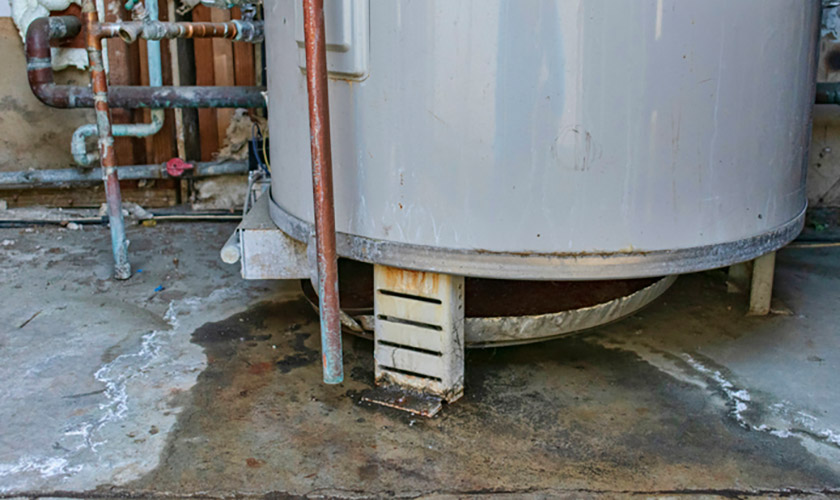
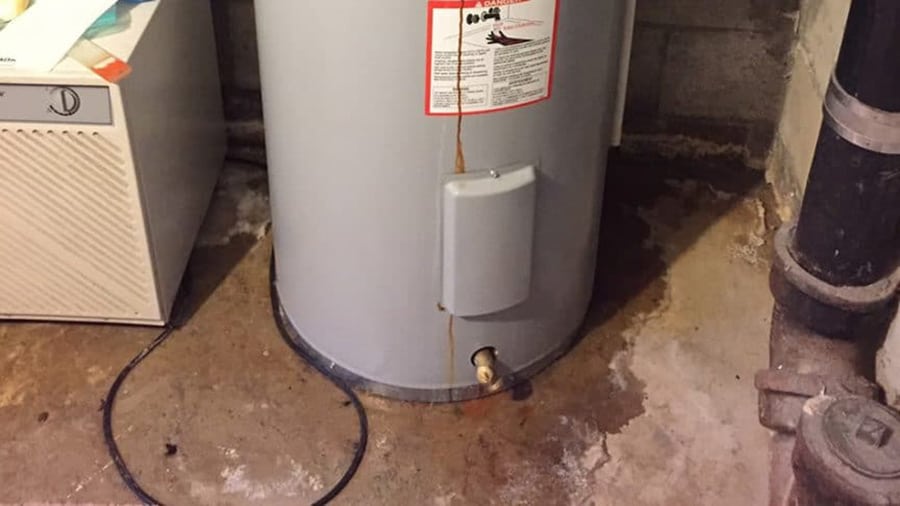
A water heater leaking from the bottom will usually come from the drain valve or the bottom of the tank. Water on the floor doesn’t necessarily indicate your water heater is leaking from the bottom. Water leaking from a side panel or from the pressure relief valve can appear to be leaking from the bottom of the water heater.
A leaky electric or gas water heater is common. We will look at why the water heater is leaking and what you can do to fix it (or replace it).
Why Your Water Heater Leaking from the Bottom
Water heater leaks from the bottom are usually a problem in two areas; the drain valve or tank failure. Let’s examine the common reasons and what you can do to source the leak.
Drain Valve Leak
The drain valve is located near the base of the water heater. What is it about a drain valve that makes a water heater leak from the bottom? During routine maintenance, the plumber might leave the drain valve improperly secured. It could be a loose rubber gasket, or the drain valve is entirely loose.
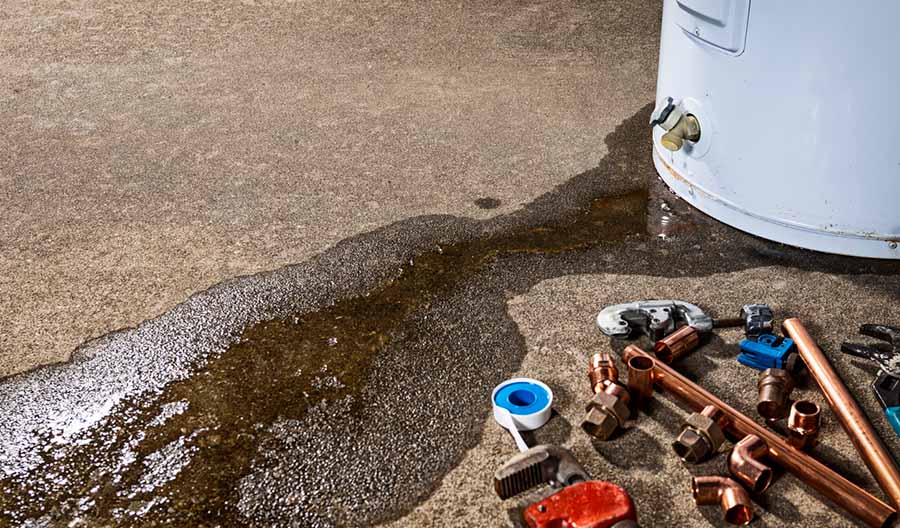
Typically, faulty valves are not a big deal. A leaky drain valve is usually minor, with a small amount of water on the floor. It might even take time for you to notice. If you have a water heater pan, you may notice a small amount of water in the pan. If no drain pan, then you may see a small puddle of water on the floor.
There are plastic drain valves and brass drain valves. Plastic drain valves are more prone to fail. They often will crack with age or when you attempt to remove it.
Brass drain valves are better but they need Teflon tape around the threading to form a tight seal and not leak.
You’ll notice the plumber’s tape near the back of the drain valve. The deterioration of this white tape is common in brass drain valves. You can fix these minor problems with a wrench, a fresh wrap of plumbers tape.
We recommend you replace plastic valves with drain valves. The best time to do this is when you are doing water heater flushing. Drain valve replacement is a relatively easy fix for most homeowners. See our post on drain valve replacement.
Corroded Tank Lining
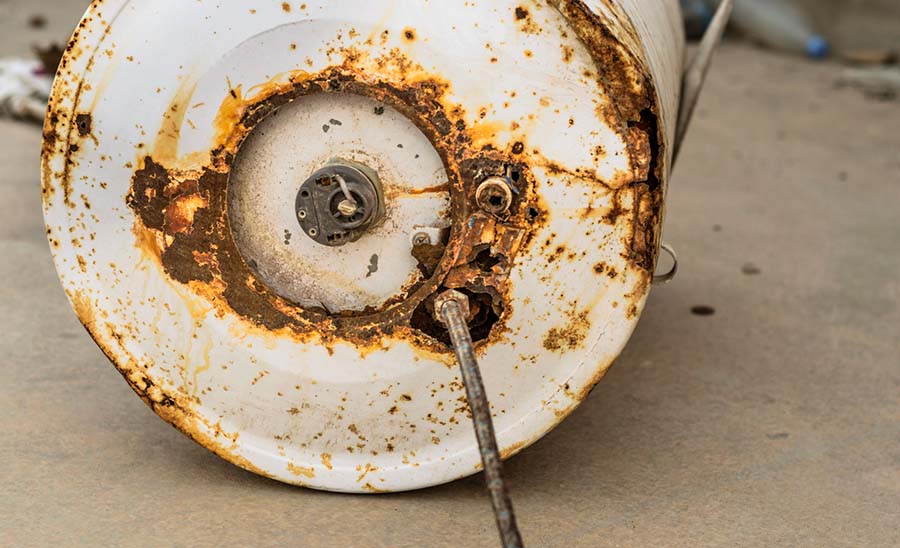
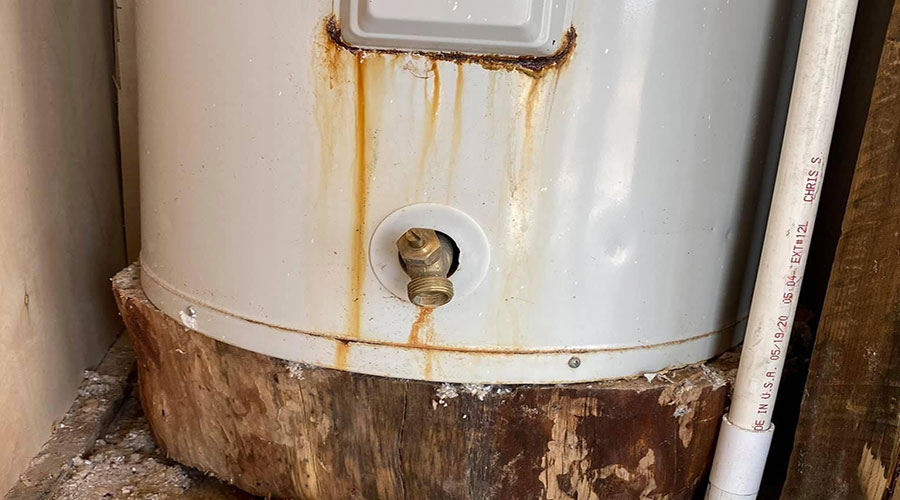
Corrosion might be a bigger problem than you thought if you discover it late. Sediment buildup is the primary cause of corrosion in water heaters. Sediment eats at your tank from inside. It could take a long time to discover the damage, especially if you don’t regularly inspect your water heater.
You can remove sediment buildup by flushing the water heater tank. We recommend you flush your water heater once a year. The processing for flushing a water heater is the same whether you have a gas or electric water heater.
Sediment will first erode the sacrificial anode rod. After the anode rod deteriorates, the sediment begins attacking the lining inside the water heater tank. Once the water heater liner deteriorates it can form pinhole leaks in the bottom of the unit where the sediment accumulates.
However, if you determine that the tank itself is leaking, you’ll need to replace the water heater.
The Pressure Relief Valve is Leaking
If your temperature & pressure relief (TPR) valve is leaking, you may think the water heater is leaking from the bottom. The TPR valve has a discharge pipe that may discharge near the floor causing a pool of water on the floor or inside the drain pan.
The TPR valve will release water to reduce excess pressure that builds up inside the internal tank. So, a leaking pressure relief valve may not indicate a problem with the valve. The problem could be that your thermostat is set too high or that the thermostat is bad.
Excessive pressure inside the tank can also be a sign that the water heater needs replacing. High pressure inside the tank is a serious issue, however, if you determine the tank is in good condition and leaking from the TPR valve discharge tube, you could add an expansion tank.
When the pressure relief valve discharges water because of too much pressure inside the water heater tank, the valve could be bad. Replacing the TPR valve is similar to replacing the drain valve. See our post on pressure relief valve replacement.
What to do if Your Water Heater Leaks from the Bottom?
At this point, let’s assume the damage from the leak isn’t too severe. You have two options, fix the leaky water heater yourself or call a plumber. Since you need to stop the leak as soon as possible, you can check it out before calling a plumber.
Find the Location of the Leak
This far, you know there is water on the floor and that the leak is likely at the bottom of the hot water tank. We don’t know if it’s an internal problem or a drain valve problem. Assessing the leak area means checking where the leak’s source.
Run your finger along with the mouth of the drain valve. If you feel some wetness on the wetness, your problem is likely the valve. Also, check around the valve and look for signs of leakage around the drain valve threading.
Once you confirm the drain valve as the source of the leak, you can either tighten it or replace the drain valve entirely. Twist it counter-clockwise with a size-appropriate wrench to remove the faulty valve and replace it with a new one.
If the leak is coming from within the tank, there is substantial corrosion in the tank. Sediment buildup in the tank eats away at the lining in the tank. Over time, the water heater gets thinner and finally cracks. The leak at the bottom starts as a drip before it becomes irreparable.
Stop Further Damage
Close the main water shutoff valve to shut off the water supply and turn off the water heater’s power supply. Alternatively, you can also shut off the water from the main water supply. Shutting off the electrical power won’t affect other house appliances since most water heaters have a dedicated power supply.
For gas heaters, the OFF dial should be on the side of the heater near the bottom.
How to Replace the Drain Valve?
1. Prepare to Flush the Water Heater
Before changing the drain valve, you’ll need to drain (and flush) the water heater. Connect the drain spout to a garden hose that drains the water outside.
Open the drain valve for about five seconds and close it. Opening and closing the drain valve unsettles any sediment in the tank. Repeat the process a few times until you are sure your tank is clear of all sediments.
After shutting off the water supply and power supply (in electric models), check the pressure by turning on all the hot water faucets. You’ll know the water is shut off if the initial burst of pressure tapers off to a drip.
However, leave one hot water faucet open to alleviate any pressure. This faucet should be the one closest to the water heater. Use the tap in the shower or the tub.
2. Open the Drain Valve
Opening the drain valve should be easy. You can open it by hand. If it proves difficult, use a flat-head screwdriver to get it loose. It is advisable to use a garden hose to reduce your workload. Otherwise, a bucket should work. However, that comes with repetitively draining the bucket as it fills.
3. Flush the Heater
Fill the tank with water and open the tank. This step is only to make sure your tank has no sediment after the repair. It might take a few flushes to get a clean run-off. Make sure the tank is empty for the next step.
4. Remove the Faulty Drain Valve
Turn the drain valve counter-clockwise to remove it from the tank. A pipe wrench, channel lock plier, or adjustable wrench should work.
5. Install a New Drain Valve
Wrap the new drain valve in the plumber’s tape around the threads for a tighter fit. The new drain valve should point in the same direction as the old valve if the fit is tight enough. You can check if it’s properly installed by turning it clockwise. You should feel some resistance.
6. Refill the Tank
Close the drain valve and remove the garden hose. Turn the water back on and wait for the open faucet to let off nothing but water. Let the water run for about 5 seconds. There shouldn’t be any sediment in the water.
Turn off the faucet. Go round the house, briefly turning on all the water heaters. This is to remove any air from the taps.
7. Turn On the Water Heater
Turn on the water heater and the power. Give it an hour, then check if the water heater function runs correctly.
Over the next few days up to a week, keep an eye out on your newly installed drain valve to check if it has any leakage.
How Much does it Cost to Replace a Drain Valve?
Replacing a drain valve is cost-effective to stop a hot water heater from leaking from the bottom. A new valve can cost $10 to $30. However, plastic drain valves are not preferable since they are more prone to damage than brass drain valves.
A brass drain valve can cost from $17 to $30 if it has a garden house cap.
To get the actual cost of a replacement, you have to consider the cost of a plumber, too. Plumbers charge by the hour. The going rate for a plumber is between $40 and $150 per hour. Repairing a leaking water heater can take up to 3 hours. Your repair budget, excluding the cost of material, would be about $150 to $450.
Replacing a Leaking Water Heater
Replacing the leaking water heater is the last resort if the tank is beyond repair. Hopefully, it will have given you adequate service by the time it springs a leak. A typical water heater will last about 12 years before it is ready for complete replacement.
Still, 20 years is typical with regular maintenance.
You have a lot of options when you want new water heaters. Installing a new water heater will cost you between $1100 to $3500, depending on the size of the water heater.
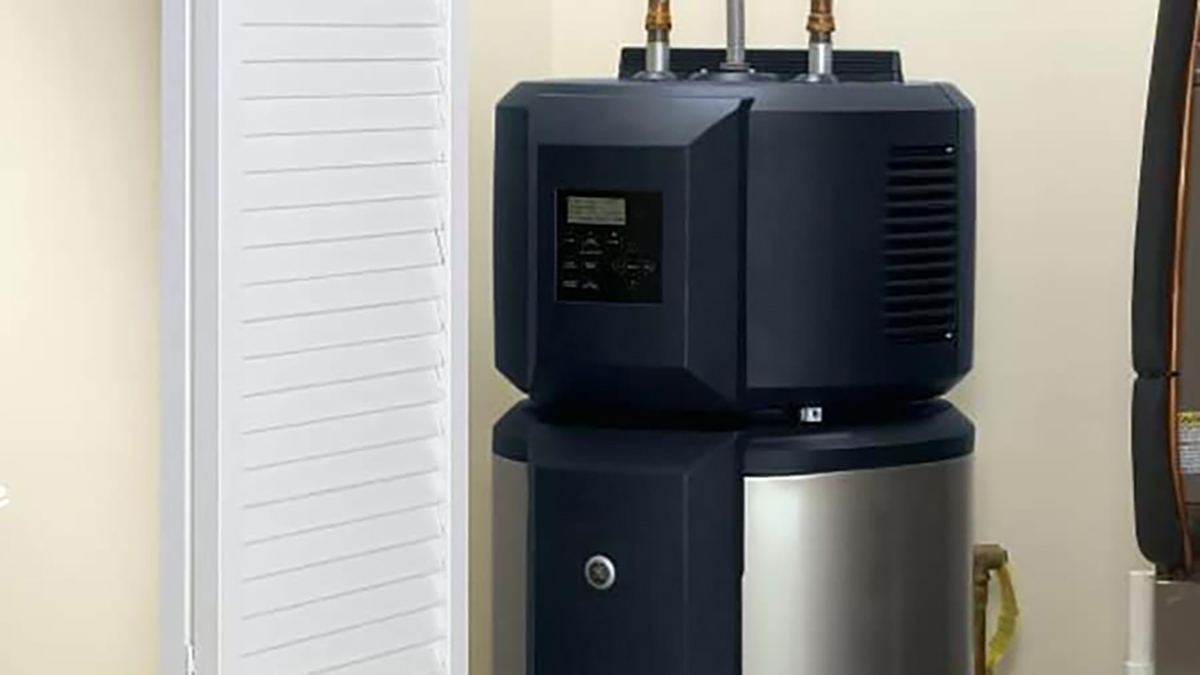
If you have an issue with tank-type water heaters, try tankless water heaters from reputable companies such as Bradford White, Rheem, A.O. Smith, and State Water Heaters.
Should You Turn Off the Water Heater if it is Leaking?
If you notice your water heater leaking, you need to turn it off immediately. Turning off your hot water heater prevents any water damage, and it helps you investigate the source of the leak without worsening the situation.
Your water heater — and most water heaters, too — have a valve at the top of the water heater. The valve is the shut-off point. It is either a pull-down handle or a valve that you should turn clockwise to turn off.
Sometimes you might notice a leak when the water leaking is too hot to approach the area. Also, the water heater may be in an inaccessible location. In such a case, professionals advise that you shut off the water from the home’s main supply.
Depending on your knowledge of water heaters, you can investigate the problem or call a professional plumber near you.
How Long Will a Water Heater Last Once it Starts Leaking?
A leaking water heater might not pose an immediate danger, but it might be time to think of a new one. Depending on the severity of the leak, you may have a few weeks left to use it or a few more years if the issue is fixable.
A week might be stretching it if the leak from the bottom is not too bad. A leaky tank can fill your basement in 5 days. In the same breath, a 20-gallon an hour leakage from a busted tank means your heater is beyond repair. It cannot keep hot water hot if there’s cold water incoming.
It is advised that you shut it down as soon as possible. Otherwise, there is the risk of the water heater forming a steam bubble and exploding from pressure.
Will a Leaking Water Heater Explode?
Yes, a leaking water heater WILL explode if you continue running it. Three reasons can make your leaking water heater explode.
- Corroded anode rod
- Excessive sediment buildup
- Gas leak
A leaking water heater can have a bad anode rod or excessive sediment buildup that eats away at the tank. With excessive sediment buildup, water and air will concentrate at the bottom of the tank, causing a pressure buildup. You might hear pop noises due to the pressure. If it is left unchecked, the water heater will give way to the pressure and explode.
The right move to prevent pressure buildup in your water heater starts with the correct installation. The proper installation means you will have a lower likelihood of a gas leak or a pressure buildup that eventually leads to the heater’s explosion.
Can You Take a Shower if the Water Heater is Leaking?
Yes, you can take a shower if your water heater is leaking. The leak would have to be small enough to maintain more hot water than the cold water coming in. However, you should only shower if you have a leaking water heater if you plan on checking the main problem.
Showering with a leaking water heater is dangerous since it exposes your home to water damage, potential pressure buildup, and explosion in the worst-case scenario.
Final Thoughts
Life will be tougher without a functioning water heater if you are used to the convenience of having one. Maintaining your current water heater means regularly checking for any signs of aging and breaking down. You can have a professional plumber run complete maintenance checks twice a year.
Also, you can make it a routine to run heater health checks every couple of weeks to ensure everything is in top shape.


